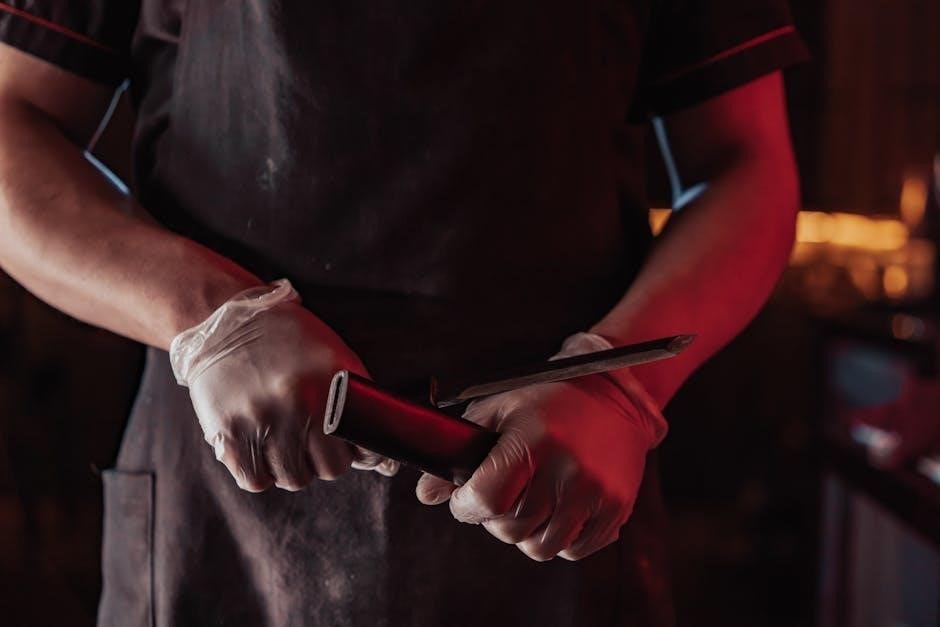
Mastering whetstone sharpening unlocks a world of culinary precision! Japanese chefs prioritize blade cleanliness, achieved through expertly honed edges and consistent angles.
Why Whetstones are Superior
Whetstones offer unparalleled control and refinement in knife sharpening, surpassing the convenience of pull-through sharpeners or electric models. Unlike abrasive methods that remove significant metal, whetstones gently reshape the blade, preserving its integrity and extending its lifespan; This nuanced approach allows for precise angle adjustments, crucial for achieving a razor-sharp edge tailored to the specific knife type.
Furthermore, whetstones provide feedback – you can feel the steel being removed – fostering a deeper understanding of the sharpening process. The progression through different grits, from coarse to ultra-fine, allows for damage repair, edge establishment, refinement, and polishing, resulting in a truly superior cutting performance. They are the preferred choice for professionals and enthusiasts alike.
Understanding the Basics of Knife Sharpening
Knife sharpening isn’t simply about making a blade “sharp”; it’s about creating a consistent, microscopic edge. This involves removing metal to form a “V” shape, known as the bevel. The angle of this bevel dictates the edge’s durability and sharpness. A smaller angle creates a sharper, but more fragile edge, while a larger angle offers greater robustness.
Whetstones utilize abrasive particles to accomplish this. Lubrication, typically water or oil, is essential to carry away metal filings and prevent the stone from clogging. Maintaining consistent pressure and angle throughout the process is paramount. Sharpening involves working through a series of grits, progressively refining the edge until it reaches the desired level of sharpness and polish.
Knife Sharpening Angles: A Comprehensive Guide
Precise angles are crucial for optimal performance! Understanding and maintaining the correct bevel is key to achieving a sharp, durable, and functional knife edge.
The Importance of Correct Angle
Maintaining the correct sharpening angle is paramount for a knife’s performance and longevity. A consistent angle creates a uniform bevel, enabling clean, efficient cutting. Too shallow an angle results in a fragile edge prone to rolling and chipping, while too steep an angle creates a durable but less acute edge, hindering finesse.
The ideal angle dictates how the blade interacts with food – a lower angle excels at slicing, while a higher angle is better for chopping. Japanese knives, renowned for their sharpness, typically utilize lower angles. Achieving and consistently replicating this angle during sharpening is the core skill to master with whetstones, ensuring a blade that performs beautifully and lasts for years.
Common Knife Types and Their Ideal Angles
Different knives demand different sharpening angles for optimal performance. Japanese Knives (Gyuto, Santoku) generally thrive at 15-18 degrees per side, creating an incredibly sharp, delicate edge perfect for precise slicing. Western Knives (Chef’s Knife, Paring Knife) typically benefit from a more robust 20-22 degrees per side, balancing sharpness with durability for various kitchen tasks.
Pocket Knives & EDC Blades often require a 25-30 degree angle per side due to their intended use and often tougher steel. These angles provide resilience for everyday carry and utility tasks. Remember, these are guidelines; consider the knife’s intended purpose and steel type when selecting your sharpening angle.
Japanese Knives (Gyuto, Santoku)
Gyuto and Santoku knives, hallmarks of Japanese cuisine, demand precision in sharpening. Aim for a remarkably acute angle of 15-18 degrees per side. This creates a supremely sharp edge, ideal for delicate slicing of fish, vegetables, and meat – tasks central to Japanese culinary techniques. Maintaining this angle consistently is crucial; even slight deviations impact performance.
The thinner edge, while incredibly sharp, is more prone to chipping. Therefore, careful handling and regular honing are essential. Using finer grit whetstones (3000-6000+) will refine the edge and enhance its slicing capabilities. Prioritize a light touch and controlled movements during sharpening to preserve the blade’s integrity.
Western Knives (Chef’s Knife, Paring Knife)
Western-style knives, like chef’s knives and paring knives, generally benefit from a slightly steeper sharpening angle than their Japanese counterparts. A range of 20-25 degrees per side provides a robust edge suitable for a wider variety of kitchen tasks – chopping, dicing, and more forceful cutting motions.
This broader angle enhances durability, making the edge less susceptible to chipping when encountering harder ingredients. While not achieving the extreme sharpness of Japanese blades, a well-sharpened Western knife offers excellent performance and longevity. Begin with medium grit stones (800-1200) to establish the edge, then refine with finer grits (3000-6000) for a polished finish.
Pocket Knives & EDC Blades
Sharpening pocket knives and everyday carry (EDC) blades requires careful consideration of their intended use and blade geometry. Typically, a sharpening angle between 15 and 20 degrees per side strikes a good balance between sharpness and edge retention for these versatile tools.
However, some EDC blades designed for tougher tasks may benefit from a slightly steeper angle (up to 22 degrees) to improve durability. Due to the smaller blade sizes, maintaining consistent angle control is crucial. Start with a medium grit stone (800-1200) to reshape the edge, followed by finer grits (3000+) for refinement. Remember to support the blade adequately during sharpening.
Determining Your Knife’s Existing Angle
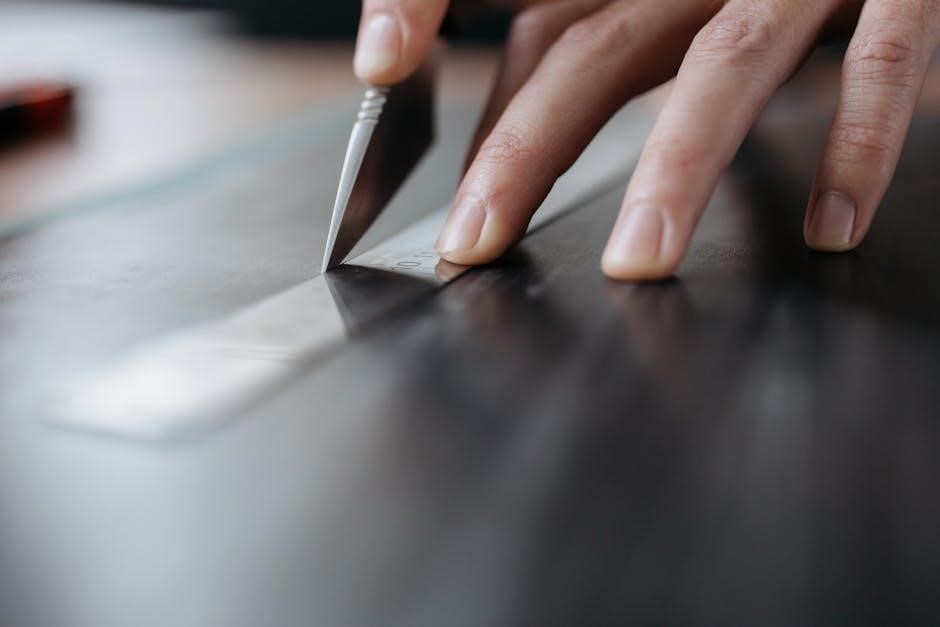
Accurately identifying your knife’s current bevel angle is vital for consistent sharpening. Two simple methods can help. The Paper Test involves drawing a marker line along the blade’s edge and then carefully sharpening. Observe where the metal is removed – this reveals the existing angle.
Alternatively, the Visual Inspection Technique requires a keen eye. Place the knife on a flat surface and examine the bevel from the side. Estimate the angle formed between the blade’s edge and the body of the knife. A 15-degree angle appears quite acute, while 20 degrees is noticeably steeper. Practice makes perfect!
The Paper Test Method
The Paper Test is a straightforward way to reveal a knife’s existing bevel angle. Begin by securely taping a sheet of paper to a flat, stable surface. Next, using a permanent marker, color along the blade’s edge at a consistent angle. Gently drag the knife across the paper, applying light pressure, as if you were slicing.
Observe where the marker is removed. If the marker disappears evenly across the entire edge, your sharpening angle matches the knife’s original bevel. If removal is concentrated on one side, adjust your sharpening angle accordingly. This method provides a visual guide for replicating the factory edge.
Visual Inspection Technique
Carefully examine the knife’s bevel – the angled surface leading to the edge. Look for the primary bevel, the larger, more visible angle, and potentially a secondary bevel, a smaller angle created by previous sharpening. The primary bevel’s angle is your target for consistent sharpening.
Estimate the angle by comparing it to known angles. A 20-degree angle is relatively acute, while a 25-degree angle is more obtuse. Practice visually estimating angles with reference points. This technique requires a keen eye and some experience, but it’s a valuable skill for understanding your knife’s geometry and maintaining its edge.

Whetstone Grit Selection for Sharpening
Choosing the right grit is crucial! Coarse grits repair damage, medium grits establish the edge, and fine/ultra-fine grits refine and polish it.
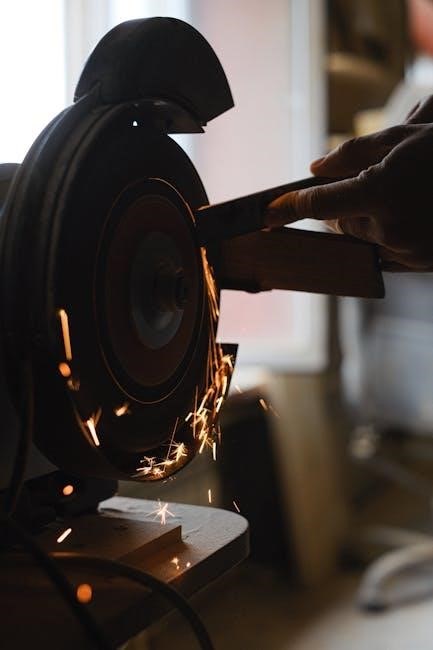
Coarse Grit (200-400) ― Repairing Damage
Coarse grit whetstones, typically ranging from 200 to 400 grit, are your first line of defense when dealing with significantly damaged blades. These stones are aggressive and designed to quickly remove metal, making them ideal for reshaping a severely chipped or dull edge. Think of them as the restorative phase of sharpening.
When using a coarse grit stone, focus on establishing a new, consistent bevel. Don’t worry about achieving a razor-sharp edge at this stage; the goal is simply to correct the blade’s geometry. Maintain a consistent angle – crucial for overall sharpness – and apply moderate pressure. Be patient, as this process can take time, especially with substantial damage. Remember to frequently flatten your stone to maintain a level surface for optimal results.
Medium Grit (800-1200) ― Establishing the Edge
Following the coarse grit stage, a medium grit whetstone (800-1200) is essential for refining the newly formed bevel and truly establishing the knife’s edge. This grit level strikes a balance between material removal and refinement, smoothing out the scratches left by the coarser stone.
Focus on maintaining the angle established during the previous step, as consistency is key. Use lighter pressure than with the coarse grit, and work methodically along the entire blade length. The goal here is to create a consistent, refined edge that’s starting to feel noticeably sharper. You should begin to feel a slight burr forming along the opposite side of the blade, indicating you’re progressing well. This stage builds the foundation for a truly sharp and functional knife.
Fine Grit (3000-6000) ― Refining the Edge
Transitioning to a fine grit whetstone (3000-6000) dramatically refines the edge created by the medium grit stone. This stage focuses on removing the remaining microscopic imperfections and further reducing the size of the burr. Employ even lighter pressure and maintain the consistent angle throughout the process.
The goal isn’t rapid material removal, but rather polishing the edge to achieve increased sharpness and smoothness. You’ll notice the burr becoming increasingly delicate with each pass. Pay close attention to feedback – the blade should feel smoother and more refined. This grit level is where a good edge becomes a truly exceptional one, capable of effortlessly slicing through food with minimal resistance. Patience and precision are paramount here.
Ultra-Fine Grit (8000+) ⸺ Polishing and Finishing
Reaching for an ultra-fine grit whetstone (8000+) elevates your sharpening to a professional level, focusing on ultimate polish and refinement. This stage isn’t about removing material, but about meticulously smoothing the edge to a mirror-like finish. Use extremely light pressure and maintain your established angle with unwavering consistency.
The burr, if any remains, will be virtually undetectable. The blade will exhibit a noticeable increase in sharpness and a heightened ability to glide through materials. This grit minimizes friction, enhancing the cutting experience. While not always necessary for everyday use, ultra-fine grits are crucial for achieving peak performance, especially with high-end Japanese knives where edge quality is paramount.
The Sharpening Process: Step-by-Step
Begin by preparing your whetstone with water or oil, then consistently draw the blade across it, maintaining the correct angle for optimal sharpness!
Preparing the Whetstone
Proper whetstone preparation is crucial for effective sharpening. Most water stones require soaking until bubbles cease, indicating full saturation – typically 5-10 minutes. Oil stones, conversely, need a liberal application of honing oil.
Ensure the stone’s surface is consistently wet or oiled during sharpening; this creates a slurry that aids in removing metal and polishing the blade. A flattening stone or lapping plate is essential to maintain a perfectly level surface, preventing uneven sharpening and ensuring consistent angle contact. Regularly flattening extends the stone’s lifespan and optimizes performance;
A stable base for the whetstone is also vital – use a non-slip mat or wet towel to prevent movement during the sharpening process, contributing to safety and precision.
Maintaining a Consistent Angle During Sharpening
Consistent angle control is paramount for a sharp, functional edge. Visualizing the angle – typically between 15-20 degrees for most kitchen knives – is the first step. Practice helps build muscle memory.
Employing a sharpening guide can initially assist in maintaining the correct angle, especially for beginners. However, strive to develop freehand technique for greater control and adaptability.
Focus on keeping the blade’s spine in contact with the stone throughout each stroke. Slow, deliberate movements are preferable to rushing. Regularly check your angle by briefly lifting the blade to assess its alignment. A slight deviation can drastically alter the edge’s performance.
Sharpening on Each Side of the Blade
Alternating sides ensures even sharpening and prevents uneven wear. Begin by establishing a burr on one side of the blade – a tiny, rough edge indicating metal removal. This typically requires 5-10 strokes, maintaining your chosen angle.
Then, switch to the opposite side and repeat the process, aiming to create a burr of similar size. The number of strokes may vary slightly.
Continue alternating sides, gradually reducing the number of strokes per side as you approach the desired sharpness. This refines the edge and minimizes the burr. Consistent pressure and angle are crucial throughout this process for a symmetrical, effective cutting edge.
Checking for a Burr
Detecting a burr confirms you’re effectively removing metal and forming a new edge. Gently run your thumb away from the blade’s edge – never towards it! You should feel a slight roughness or catch on the side you’ve been sharpening.
If no burr is present, revisit your technique, ensuring consistent angle and sufficient pressure. A larger burr indicates more aggressive sharpening, while a smaller one suggests a lighter touch.
Once a burr is established on both sides, the focus shifts to removing it. Continue alternating sides with progressively lighter strokes until the burr disappears, signaling a refined and sharp edge. Patience is key!
Advanced Sharpening Techniques
Elevate your skills with flattening, guides, and stropping! These methods refine edges, maintain whetstone surfaces, and achieve a polished, razor-sharp finish.
Flattening Your Whetstone
Maintaining a perfectly flat whetstone is crucial for consistent sharpening. Over time, repeated use causes stones to develop uneven surfaces, leading to inconsistent angles and poor sharpening results. Flattening restores the stone’s original geometry, ensuring even contact with the blade throughout each stroke.
Several methods exist for flattening. A flattening stone, specifically designed for this purpose, is a popular choice, offering precise and efficient results. Alternatively, abrasive papers (silicon carbide) adhered to a flat surface, like glass or granite, can also be used. The process involves applying firm, even pressure while moving the flattening tool across the whetstone’s surface in a consistent pattern. Regularly flattening – typically before each sharpening session or as needed – guarantees optimal performance and extends the life of your whetstones.
Using a Sharpening Guide
Sharpening guides offer a valuable aid, particularly for beginners, in maintaining a consistent angle. These tools clamp onto the blade, providing a fixed reference point against the whetstone. They eliminate much of the guesswork involved in freehand sharpening, promoting accuracy and reducing the risk of damaging the blade.
Various guide designs exist, from simple plastic clips to more sophisticated adjustable models. Select a guide compatible with your knife’s blade shape and desired angle. While guides simplify the process, they shouldn’t be relied upon indefinitely. Developing freehand technique is still recommended for ultimate control. Remember to use light pressure and follow the guide’s instructions carefully to achieve a sharp, even edge. Guides are excellent for establishing a baseline angle before transitioning to freehand sharpening.
Stropping After Sharpening
Stropping is the final, crucial step in achieving a truly refined edge. After whetstone sharpening, microscopic burrs remain along the blade’s edge. Stropping removes these imperfections, polishing the edge to a razor-sharp finish. Use a leather strop loaded with a polishing compound – typically chromium oxide or diamond paste.
Draw the blade away from the edge across the strop, maintaining the same angle used during sharpening. Several passes on each side are recommended. Light pressure is key; excessive force won’t improve the result and can damage the strop. Stropping doesn’t sharpen the knife, but rather aligns and polishes the existing edge, extending its sharpness and improving slicing performance. Regular stropping minimizes the frequency of whetstone sharpening.
Troubleshooting Common Sharpening Problems
Don’t despair! Issues like failing to create a burr or uneven sharpening are common; adjusting angle and pressure usually resolves these challenges.
Not Creating a Burr
A burr is crucial evidence of sharpening progress. If you’re diligently working through grits but failing to raise one, several factors could be at play. First, re-examine your angle consistency – even slight variations hinder burr formation. Ensure you’re applying enough pressure, but avoid excessive force, which can round the edge instead of forming a burr.
Secondly, confirm your whetstone is adequately lubricated with water or honing oil; a dry stone increases friction and reduces effectiveness. Finally, slow down! Rushing the process often leads to inconsistent angles and a lack of burr development. Practice deliberate, controlled strokes, focusing on maintaining that precise angle throughout each pass.
Uneven Sharpening
Uneven sharpening results in a blade that isn’t consistently sharp along its length. This often stems from inconsistent angle maintenance during the sharpening process. Are you mirroring the angle precisely on both sides of the blade? A slight deviation on one side will create an imbalance.
Also, ensure you’re applying even pressure across the entire blade length with each stroke. Focusing too much on the tip or heel can lead to localized sharpening. Regularly check your work by gently running your thumb (carefully!) along the edge to feel for inconsistencies. Correcting this requires revisiting the whetstone and focusing on evenness.
Scratch Marks on the Blade
Visible scratch marks on your blade during sharpening usually indicate an issue with your whetstone or technique. Often, it’s caused by using a grit that’s too coarse for the current stage of sharpening, or by abrasive particles embedded on the blade’s surface.
Ensure your whetstone is clean and properly soaked before use. Regularly flatten your whetstone to maintain a perfectly even surface, preventing localized scratching. Also, avoid excessive pressure; let the stone do the work. If scratches persist, move to a higher grit to polish and refine the edge, gradually removing the imperfections.
Maintaining Your Sharp Edge
Consistent honing and careful storage are vital! Regular honing realigns the blade, while proper storage prevents damage, preserving your whetstone-sharpened edge.
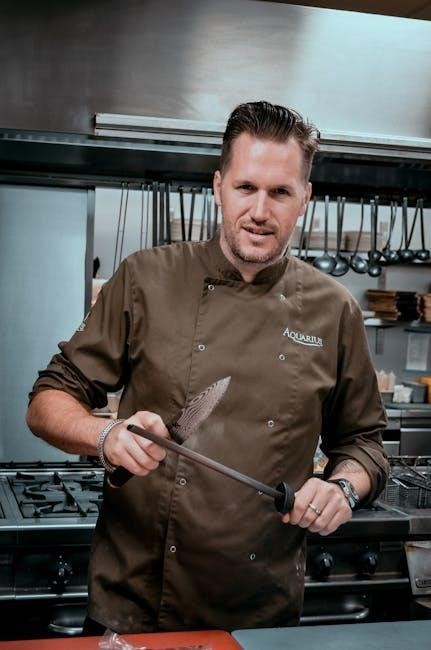
Regular Honing
Honing isn’t sharpening, but a crucial maintenance step. It realigns the microscopic teeth of the blade’s edge that bend during use, restoring its perceived sharpness. Think of it like straightening bristles on a toothbrush. Use a honing steel before or after each use for optimal results;
Maintain the same angle you use for sharpening – consistency is key! Light pressure and a sweeping motion, from heel to tip, are recommended. Avoid excessive force, as this can damage the edge. Honing doesn’t remove metal; it simply restores the existing edge’s alignment, extending the time between full sharpenings with your whetstone. A properly honed knife feels noticeably sharper and performs with greater efficiency.
Proper Knife Storage
Protecting your freshly sharpened edge is paramount! Avoid tossing knives loosely into drawers, where they’ll inevitably bump against other utensils, dulling the blade. Ideal storage solutions include knife blocks, magnetic strips, or individual sheaths. Knife blocks offer secure slots, preventing contact, while magnetic strips keep blades visible and readily accessible.
Sheaths are excellent for travel or protecting knives within a drawer. Regardless of the method, ensure the blade edge isn’t exposed to prevent accidental cuts and maintain sharpness. Proper storage minimizes wear and tear, reducing the frequency of sharpening and prolonging your knife’s lifespan. Invest in quality storage to safeguard your investment!
Resources for Further Learning
Expand your sharpening skills! Explore online tutorials, recommended whetstone brands, and detailed angle charts for optimal blade maintenance and precision.
Online Sharpening Tutorials
Numerous online resources offer visual guidance for whetstone sharpening. YouTube channels dedicated to knife skills frequently demonstrate proper technique, emphasizing angle consistency. Websites like SharpGuiside and Instructables provide detailed, step-by-step instructions with accompanying images. These tutorials often cover determining existing blade angles using methods like the paper test, crucial for maintaining the original bevel.
Look for tutorials specifically addressing Japanese knife sharpening, as they often highlight the lower angles preferred for those blades. Many resources also explain how to identify and correct common errors, such as inconsistent pressure or angle drift, leading to a sharper, more durable edge. Don’t hesitate to explore multiple sources to solidify your understanding.
Recommended Whetstone Brands
Selecting a quality whetstone is paramount for successful sharpening. King is a widely respected brand, offering a range of grits suitable for beginners to advanced users. Shapton Kuromaku stones are favored for their fast cutting speed and consistent surface. Naniwa stones are known for their exceptional polish and are popular among professional chefs.
For a comprehensive setup, consider a combination stone with both coarse and fine grits. Budget-friendly options include synthetic stones from DMT, while higher-end choices like Suehiro offer superior performance. Researching reviews and comparing grit options will help you choose stones tailored to your knife types and sharpening needs, ensuring optimal angle maintenance.
Sharpening Angle Charts
Visual aids are crucial for maintaining consistent sharpening angles. A general guideline suggests 15-20 degrees for Japanese knives (Gyuto, Santoku) to preserve their delicate edge geometry. Western knives, like chef’s knives, typically benefit from a 20-25 degree angle for increased durability. Pocket knives and EDC blades often require a steeper 25-30 degree angle due to their thicker blade stock and intended use.
Online charts provide detailed angle references, often displaying visual representations. Remember these are starting points; adjust based on your knife’s existing bevel and desired sharpness. Consistent practice with an angle guide, coupled with chart references, will build muscle memory for accurate sharpening.